Trust Page
Trust Page
The Trust Page submenu offers a public page where external parties can review selected security, privacy, and compliance information. It promotes transparency while ensuring controlled access to organizational content.
You can configure the Trust Page internally and provide external access through a public link.
Viewing the Trust Page
This guide outlines how internal users can access and review the Trust Page configuration.
- Open the main navigation menu.
- Select the Trust Page submenu.
- Review the Trust Page preview for accuracy.
- Verify that the displayed information and layout meet requirements.
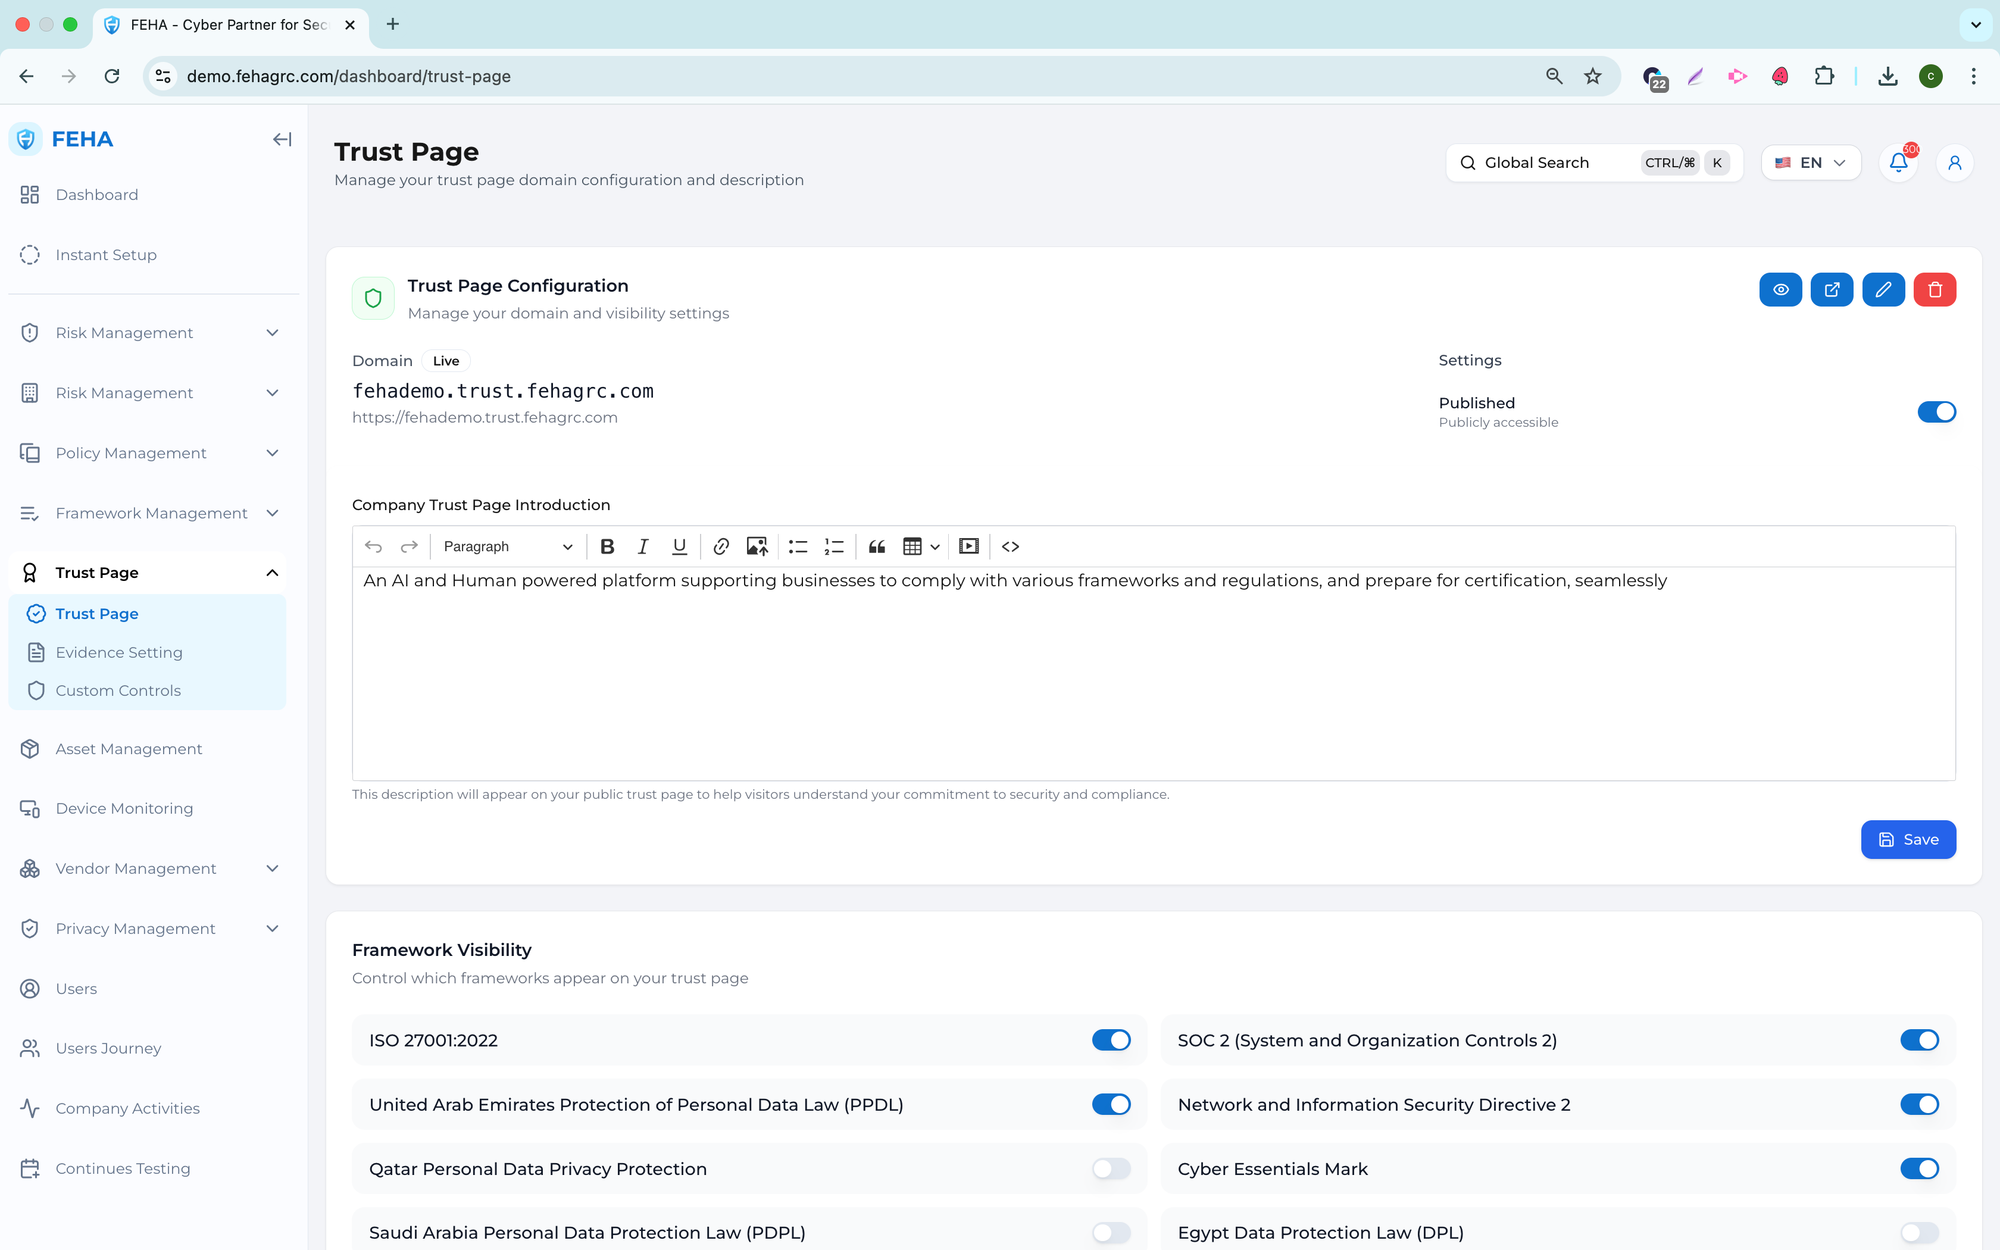
Trust Page Content Configuration
This guide outlines how to configure the information displayed on the Trust Page.
- Access the Trust Page submenu.
- Select the configuration or edit option.
- Determine which sections will be visible to external viewers.
- Save your configuration changes.
- Review the updated preview of the Trust Page.
Note: Only approved, non-sensitive information should be visible on the Trust Page.
Managing Visible Frameworks and Certifications
This guide outlines how to display frameworks or certification status on the Trust Page.
- Access the Trust Page submenu.
- Go to the frameworks or certifications section.
- Select the frameworks or certifications you want to display.
- Save your changes.
- Review the Trust Page to confirm the information displays correctly.
Reviewing Trust Page Request Details
This guide outlines the process for reviewing details submitted by external users.
- Begin by selecting a request from the list.
- Review the requester’s information and the type of request submitted.
- Assess the request based on internal guidelines.
- Determine the appropriate action to take.
How to Update the Trust Page Status
This guide outlines the steps to enable or disable the Trust Page.
- Access the Trust Page submenu.
- Locate the Trust Page status option.
- Select whether to enable or disable public access.
- Save your changes.
- Confirm that the status has been updated.
Note: Disabling the Trust Page will immediately prevent external access.
Leverage the Trust Page to Enhance Transparency
The Trust Page enables controlled transparency by allowing external parties to access selected compliance information, while ensuring internal approval and oversight.
Review the Trust Page regularly to ensure published information remains accurate and relevant.
Evidence Setting
The Evidence Setting submenu manages evidence templates for control groups. Users can add, remove, search, and adjust template visibility to support consistent evidence collection.

Adding Evidence
To add an evidence template to a group, follow these steps.
- Open the Evidence Setting page.
- Select the Manage Templates button on the desired group.
- Select the add button on the relevant row in the Available Templates list.
- Select Save to apply the changes.
Removing Evidence
To remove an assigned evidence template from a group, follow these steps.
- Open the Evidence Setting page.
- Select the Manage Templates button on the desired group.
- Select the remove option on the relevant row in the Assigned Templates list.
- Select Save to confirm the removal.
Searching Template Groups
To search for a specific evidence template group, follow these steps.
- Open the Evidence Setting page.
- Select the Search Template Groups field.
- Enter the group name or keyword.
- Review the filtered results.
Hiding an Assigned Control
To hide an assigned evidence template without removing it, follow these steps.
- Open the Evidence Setting page.
- Select the Manage Templates button on the desired group.
- Toggle the visibility switch on the relevant row in the Assigned Templates list.
- Select Save to apply the change.
Note: Hidden templates stay assigned but will not appear during evidence submission.
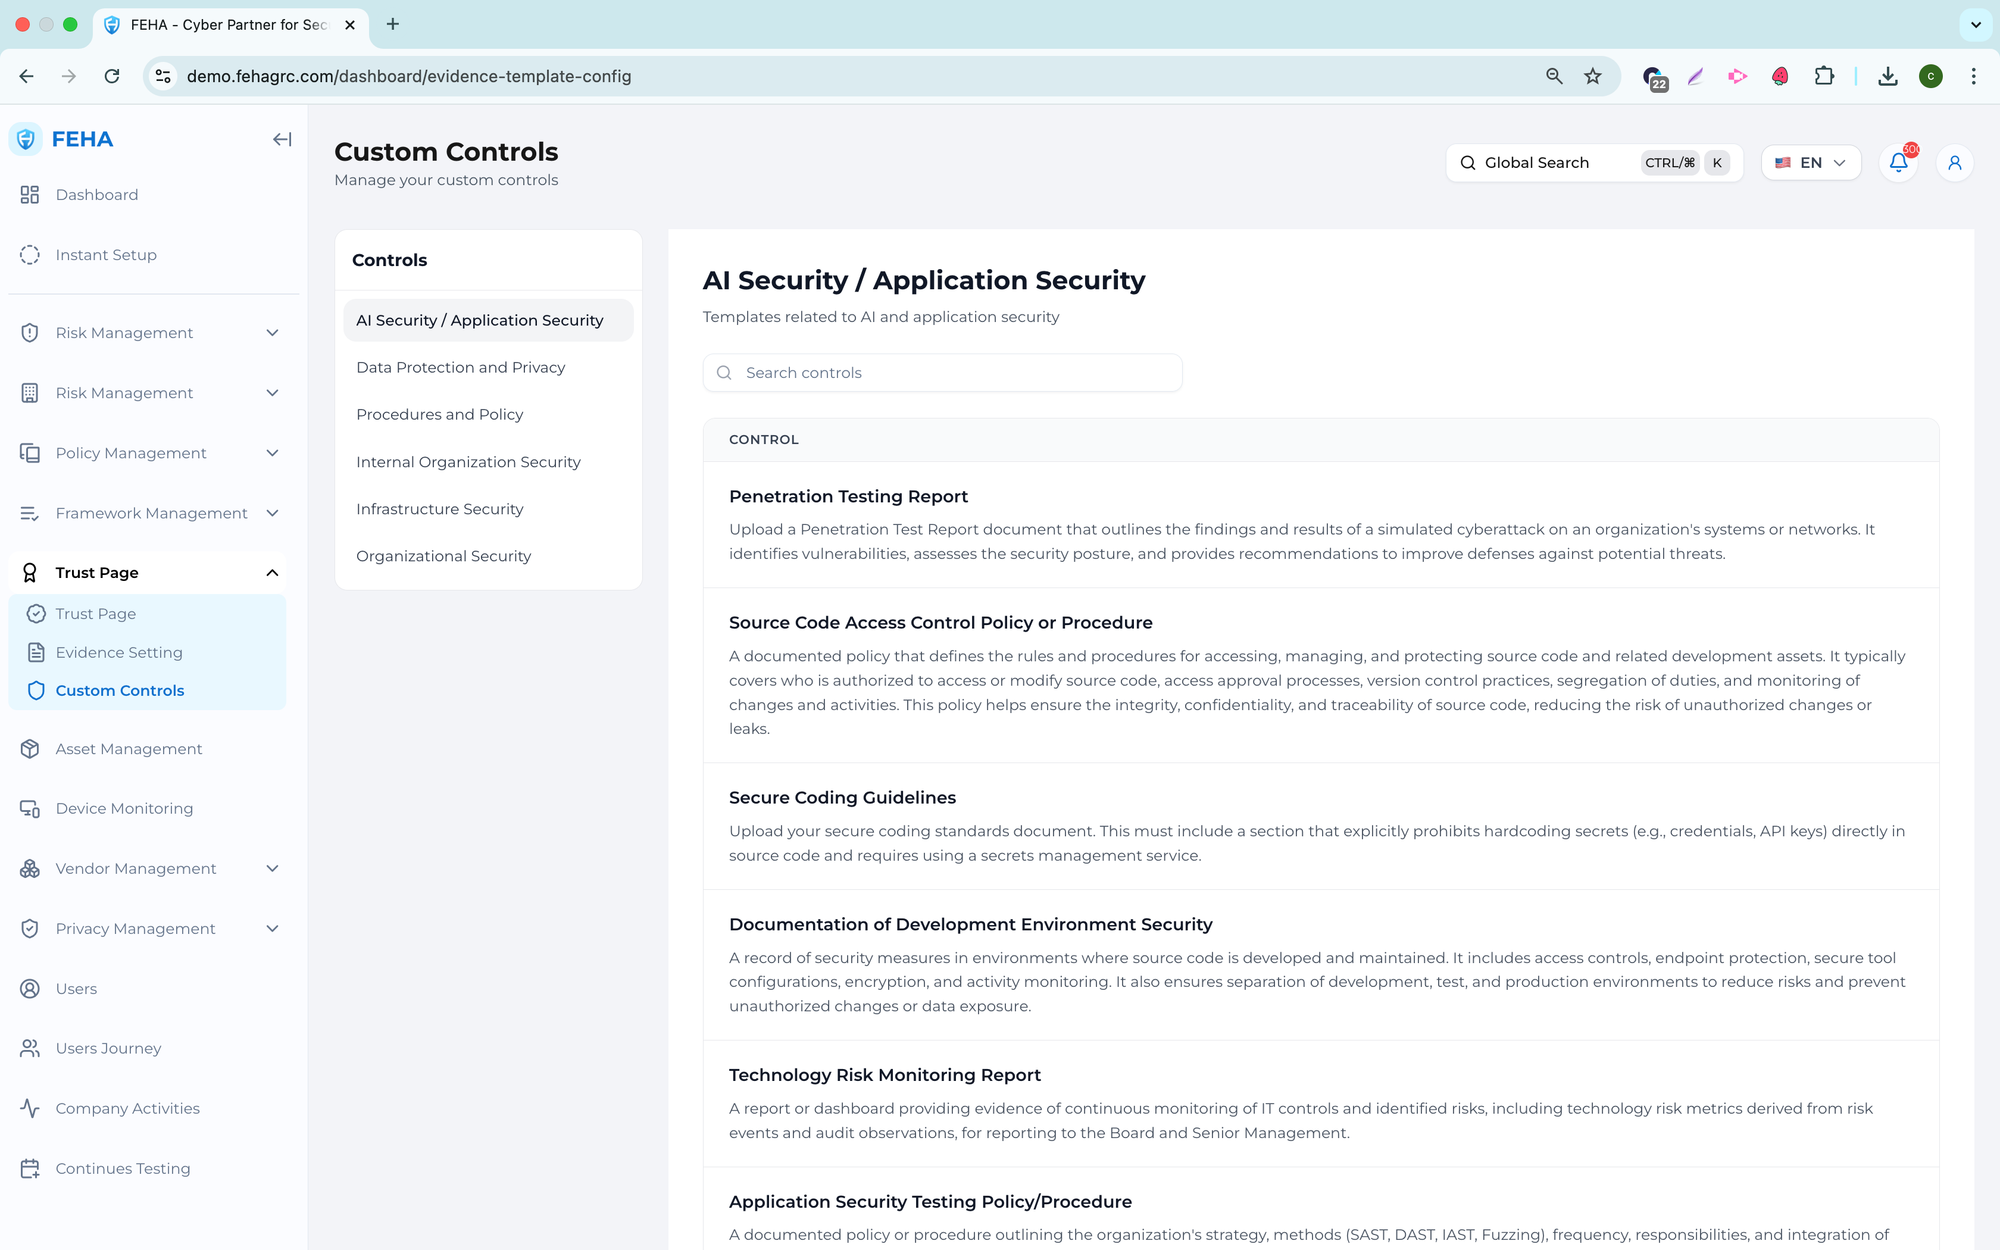
Custom Controls
The Custom Controls submenu lets you configure and manage custom descriptions for controls in selected groups. This feature helps organizations align control descriptions with internal processes and implementation details.
Enabling Custom Description
This section explains how to add or activate a custom description for a control.
- Open the Custom Controls page.
- Select the relevant control group.
- Select the control from the list.
- Enter the required information in the custom description form.
- Select Update to save your changes.
Note: Custom descriptions replace default descriptions for internal reference.
Removing Custom Configuration
This section explains how to remove a custom description from a control.
- Open the Custom Controls page.
- Select the relevant control group.
- Select the control with a custom description.
- Select Delete Configuration.
- Confirm the deletion in the confirmation dialog.
Note: Removing the configuration restores the default control description.
Searching Controls
This section explains how to search for controls within a control group.
- Open the Custom Controls page.
- Select the relevant control group.
- Select the Search field.
- Enter the control name or keyword.
- Review the list of matching controls.