Security Scanner
Dashboard Vulnerability
The Dashboard Vulnerability submenu offers an overview of website scan results, including detected risks, scan history, and generated reports to support ongoing vulnerability monitoring and remediation.
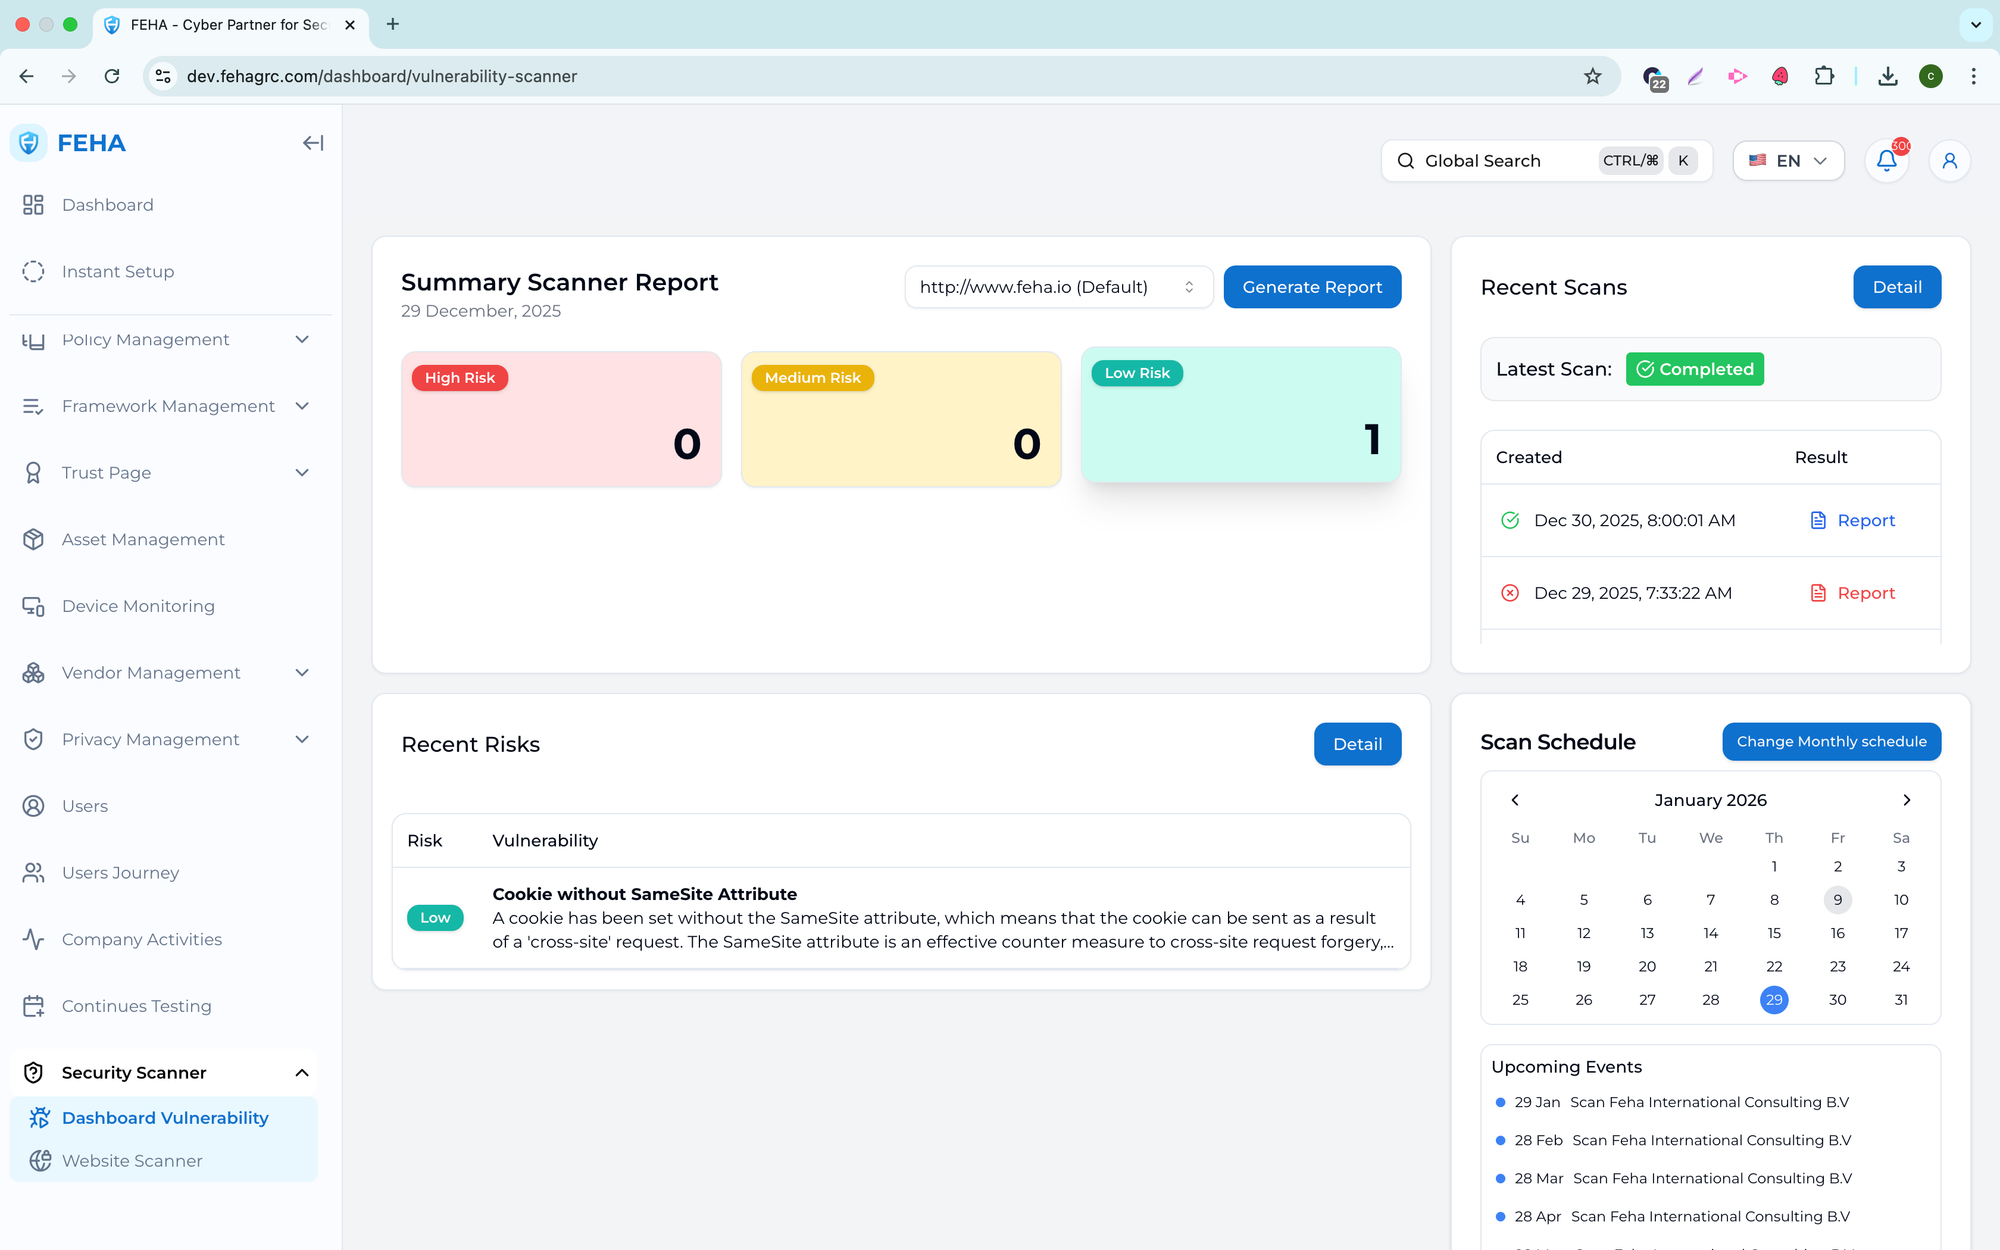
Generating a Vulnerability Report
This section outlines how to generate a report from an existing scan result.
- Open the Dashboard Vulnerability page.
- Select a website that has completed a scan.
- Select Generate Report.
- Review the PDF preview containing the scan results.
Note: Generated reports reflect vulnerabilities identified at the time of the scan.
Viewing the Risk List
This section explains how to view risks detected in scan results.
- Open the Dashboard Vulnerability page.
- Select Details in the Recent Risks section.
- Review the list of risks detected during scans.
Viewing the Scan List
This section explains how to view your scan history.
- Open the Dashboard Vulnerability page.
- Select Details in the Recent Scans section.
- Review the list of completed scans.
Changing Scan Frequency
This section explains how to change the scan schedule.
- Open the Dashboard Vulnerability page.
- Select Change Biweekly Schedule.
- Select the desired frequency in the Change Scan Frequency modal.
- Review the automatically scheduled scan time.
Note: Schedule changes will apply to future scans.
Viewing Existing Reports
This section explains how to view previously generated reports.
- Open the Dashboard Vulnerability page.
- Select Details in the Recent Scans section.
- Review the list of completed scans.
- Select Report in the relevant scan row to view the corresponding report.
Website Scanner
The Website Scanner submenu scans websites for potential security vulnerabilities. It offers domain scanning, risk review, deep scan requests, and scan result export.
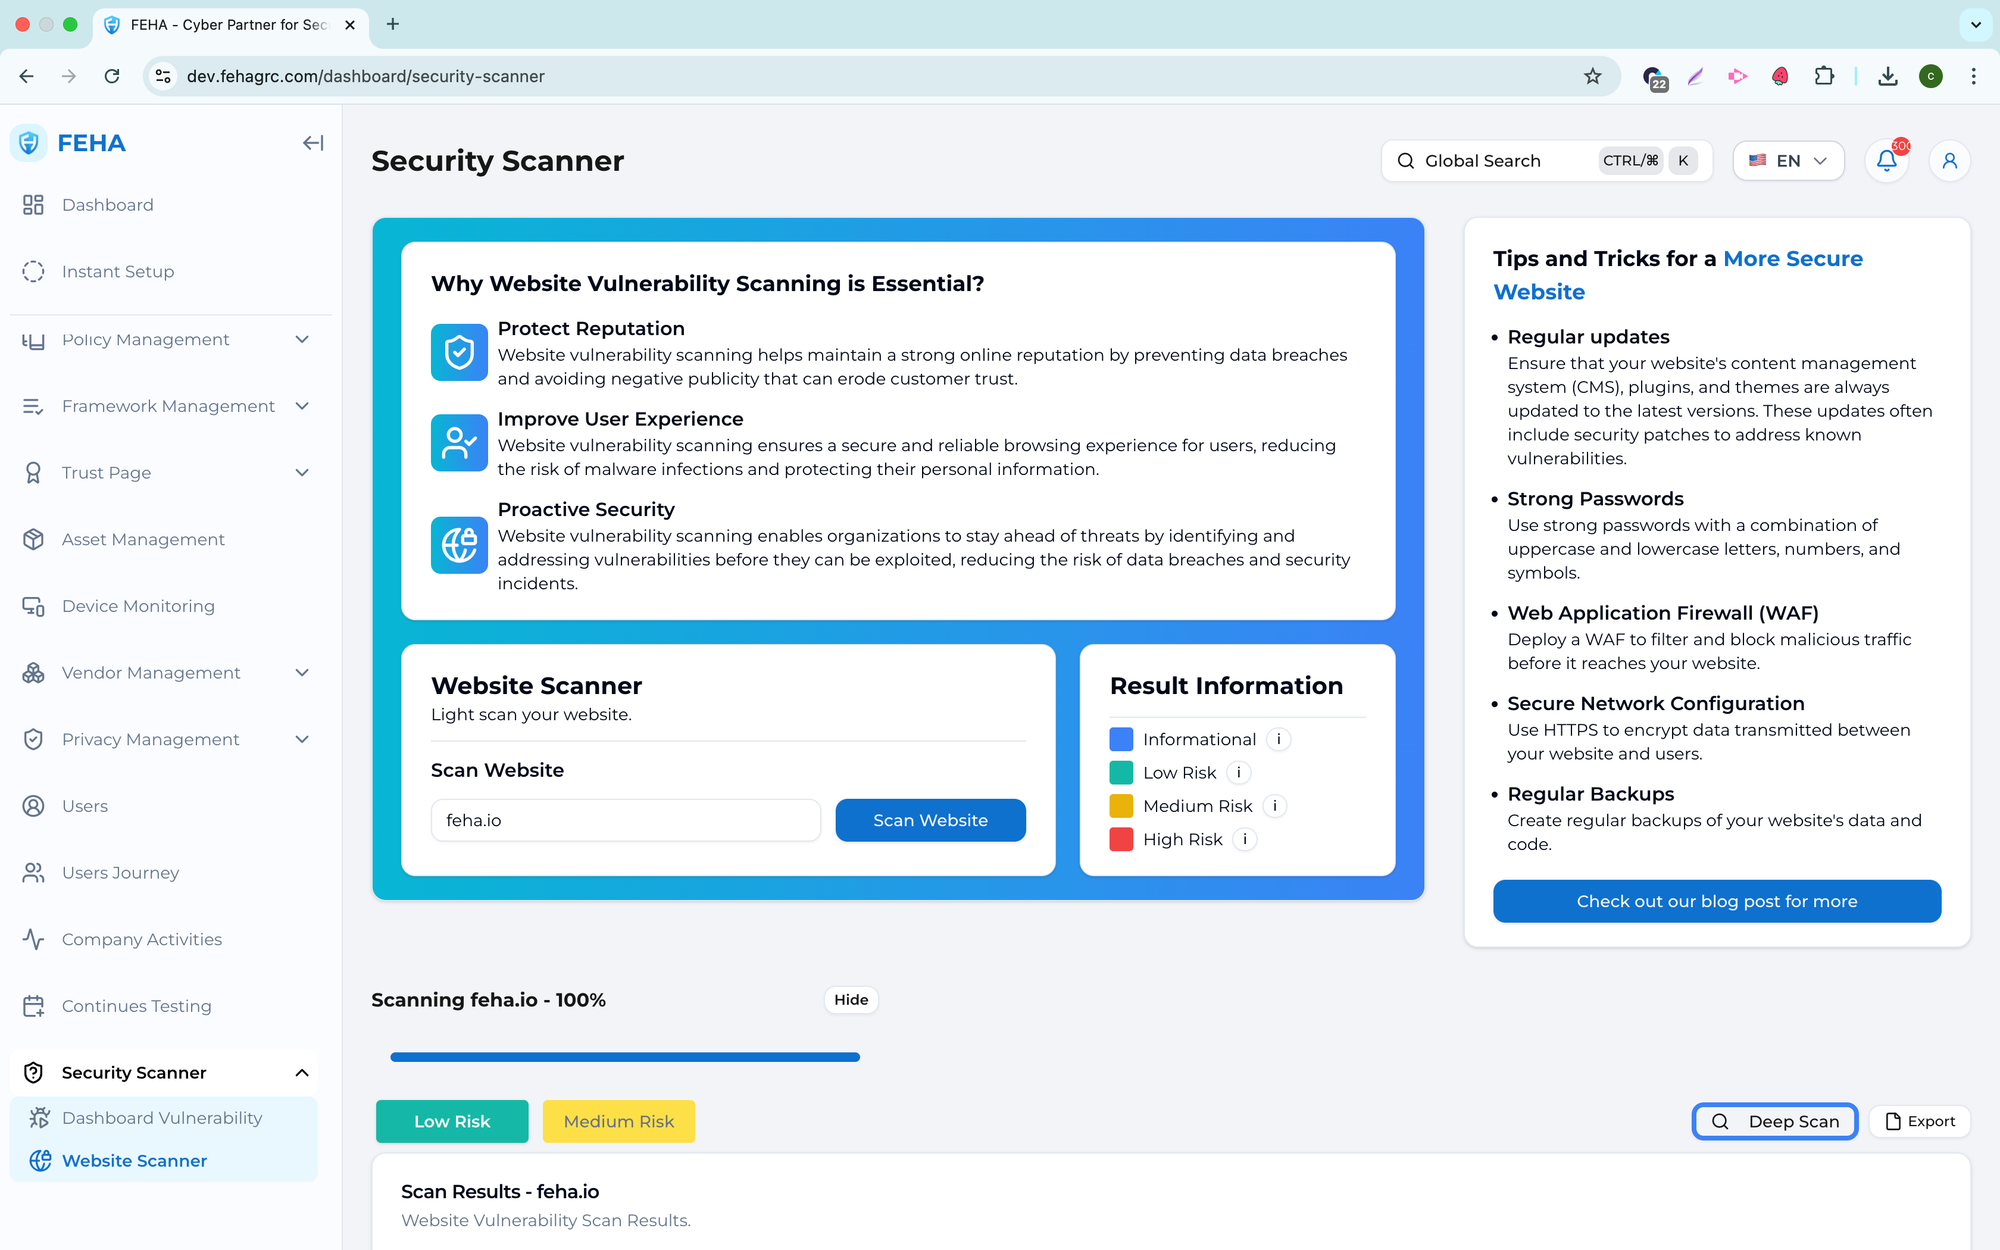
Scanning a Website
Follow these steps to perform a website scan.
- Open the Website Scanner page.
- Enter the domain in the Enter Your Domain field.
- Select Scan Website.
- Wait until the list of detected risks is displayed.
Viewing URL Details
Follow these steps to view detailed information for a specific URL.
- Open the Website Scanner page.
- Enter the domain in the Enter Your Domain field.
- Select Scan Website.
- Wait until the list of detected risks is displayed.
- Select Detail URL in the relevant risk row.
Sending a Deep Scan Request
Follow these steps to request a deep website scan.
- Open the Website Scanner page.
- Enter the domain in the Enter Your Domain field.
- Select Scan Website.
- Wait until the list of detected risks is displayed.
- Select Deep Scan.
- Complete the deep scan request form.
- Select Submit.
Note: Deep scans may take additional processing time.
Exporting Scan Results
Follow these steps to export scan results.
- Open the Website Scanner page.
- Enter the domain in the Enter Your Domain field.
- Select Scan Website.
- Wait until the list of detected risks is displayed.
- Select Export.
- Review the downloaded CSV file in your local storage.
Viewing Blog Content
Follow these steps to access related blog content.
- Open the Website Scanner page.
- Select Check Out Our Blog Post for more information.
- Review the blog content displayed.